


Background and Purpose
Elbow injuries in overhead throwing athletes continue to increase at all levels and ages, particularly among baseball pitchers. Between 2011 and 2023, elbow injuries were the most common injury reported by Major League Baseball (MLB).1 In particular, injuries to the ulnar collateral ligament (UCL) have seen an early rise in professional baseball, with pitching velocity, fatigue/overuse, shoulder loss of motion, and year-round play all contributing to this trend.2–5 Conte et al6 reported that 25% of major league and 14% of minor league pitchers had undergone UCL surgery. In 2019, Leland et al7 reported an increase in those percentages to 26% and 19%, respectively. Following UCL reconstruction, previous reports have cited that 83% of athletes were able to return to the same level of play or higher following surgery.8 Recently, Cain et al9 have reported a 98% success rate with UCL reconstructions and a 99% success rate with UCL repair utilizing the internal brace.
On the other hand, UCL revision surgeries are also increasing in frequency. Keyt et al10 reported a 1 to 15% revision rate in the past several years. The success rates following revision reconstruction of the UCL have been less than favorable. Camp et al11 reported a 77% rate of return to play but only 55% returned to same level of play. Andrews et al12 reported only 47% of pitchers were able to return to their pre-injury level of participation after revision. Giogavac et al13 in a systematic review of five articles on UCL revision surgery, reported a 78% return to pre-injury level in pitchers at the major league, minor league and collegiate levels. The increase in revision surgeries and the variability in outcomes highlight the need for improved surgical techniques and individualized rehabilitation approaches.
There have been numerous articles written describing the rehabilitation following UCL reconstruction and UCL repair with internal brace but no articles to date have discussed the rehabilitation following the UCL hybrid surgery procedure.14–16 The purpose of this paper is to describe this new surgical technique and its associated rehabilitation programs, emphasizing the importance of rehabilitation under the guidance of a rehabilitation professional experienced with overhead athletes.
Hybrid UCL Reconstruction – The Surgical Technique
Since 2008, the senior author (KM) has employed a novel technique for reconstructing the UCL of the medial elbow. Today, over 400 cases have been reconstructed using this technique. The method involves using a standard autogenous graft, either palmaris longus or gracilis tendon, and internal brace augmentation.
Surgical Technique - Overview
Setup
A standard set-up is utilized, and a tourniquet is applied for hemostasis. The affected upper extremity is prepped and draped in a standard fashion.
Palmaris Longus Harvest
A 1 cm transverse incision is made at the flexion crease of the wrist. The palmaris longus (PL) tendon is isolated. A 2-0 vicryl suture is weaved through the tendon with a baseball stitch, and the tendon is released distally to this. The tendon is then harvested from the forearm with a tendon stripper. Subcuticular closure of the wound follows.
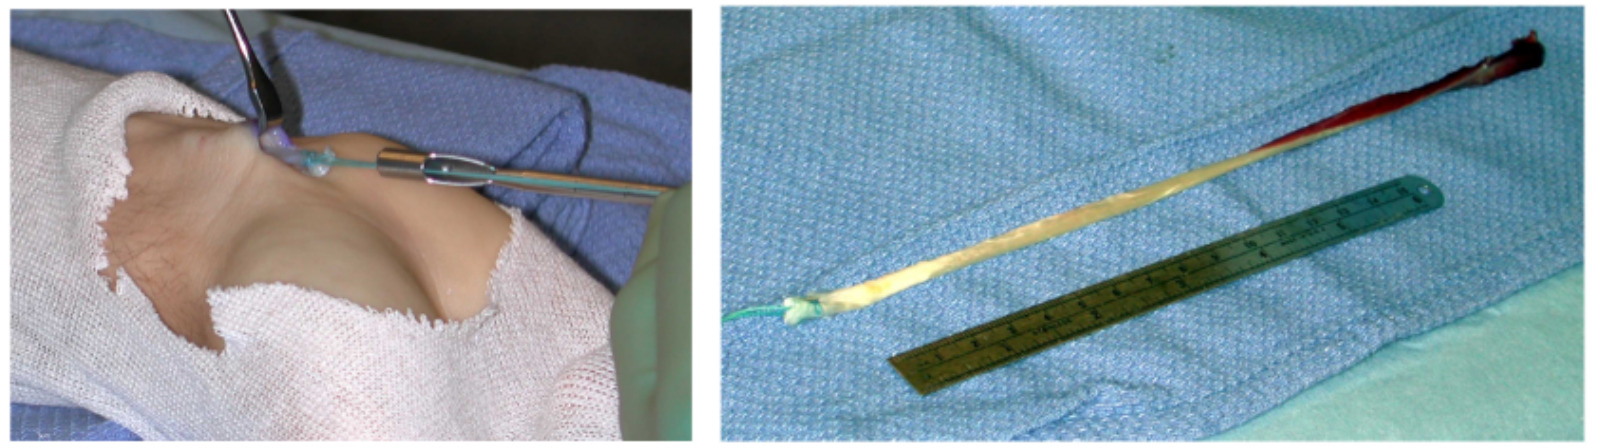
The graft is prepared by removing the muscle belly and tubing the opposite tail with a second 2-0 vicryl stitch. The graft is removed from the operative field and placed safely on the back table.
If a gracilis tendon graft is required, the senior author prefers using the contralateral lower extremity.
Approach
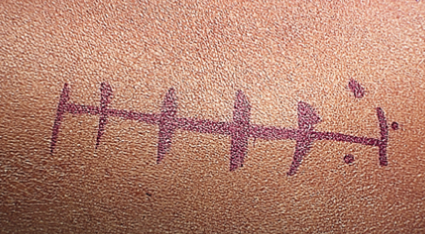
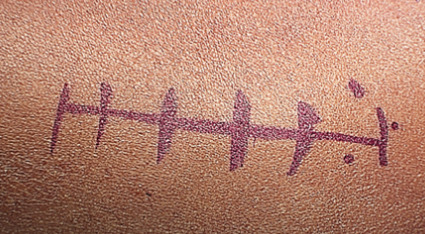
The surgical approach is made through a skin incision beginning at the upper margin of the medial epicondyle and carried distally for a typical length of 6 cm.
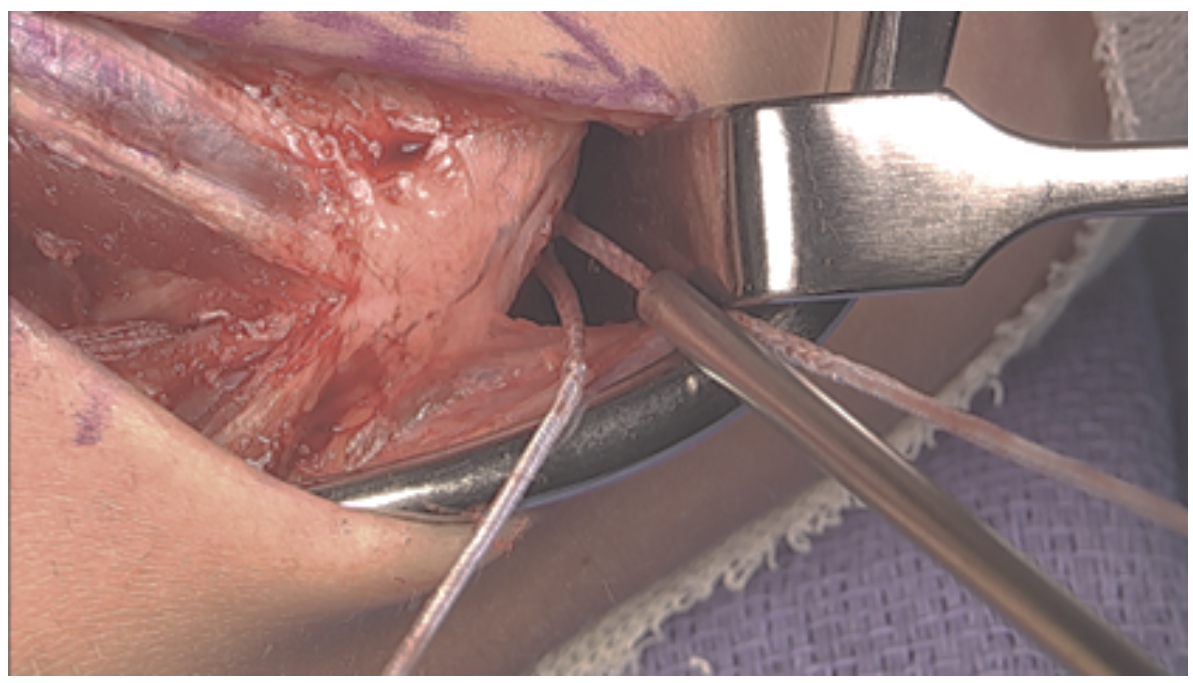
The superficial nerve branches are isolated and preserved.
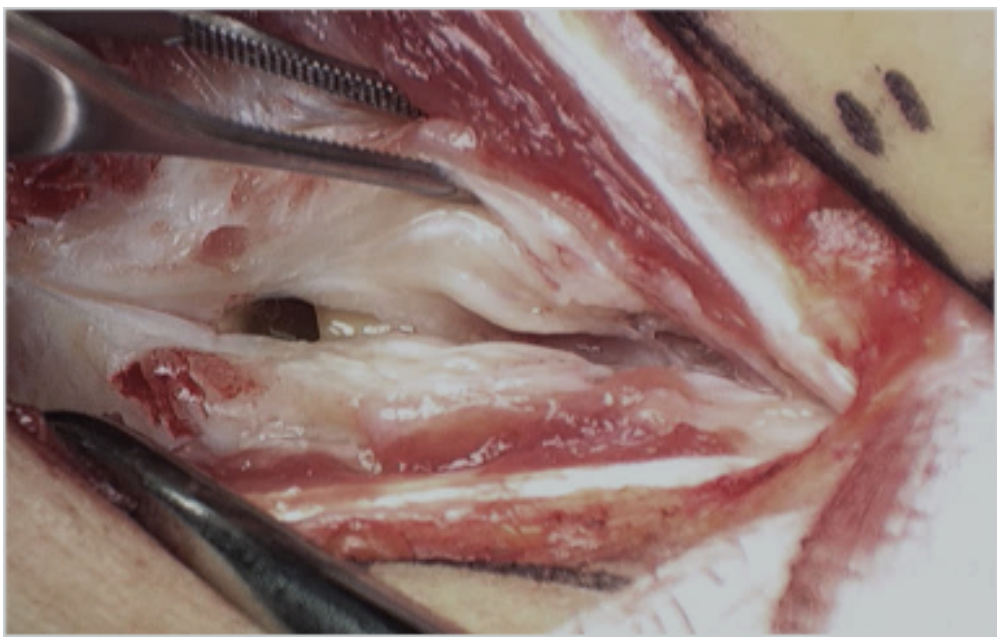
The ulnar nerve is elevated off the proximal aspect of the medial epicondyle facilitating exposure for tunnel placement. A partial release of the medial intermuscular septum is often employed as well providing decompression of the nerve.

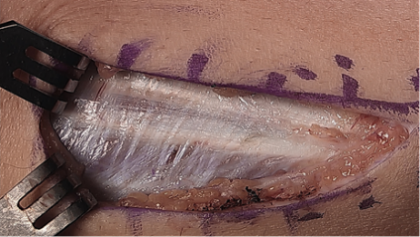
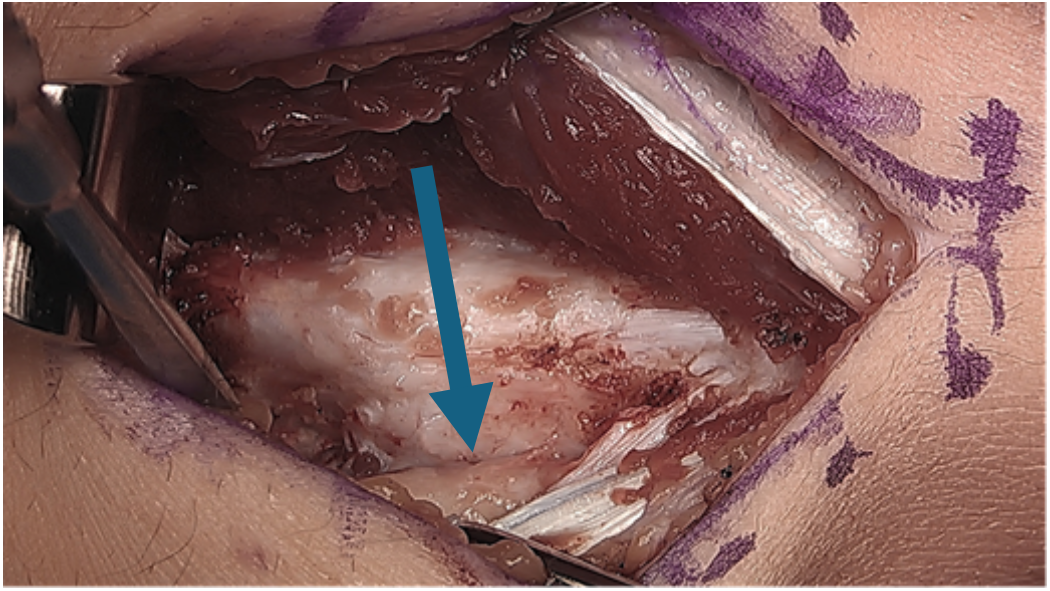
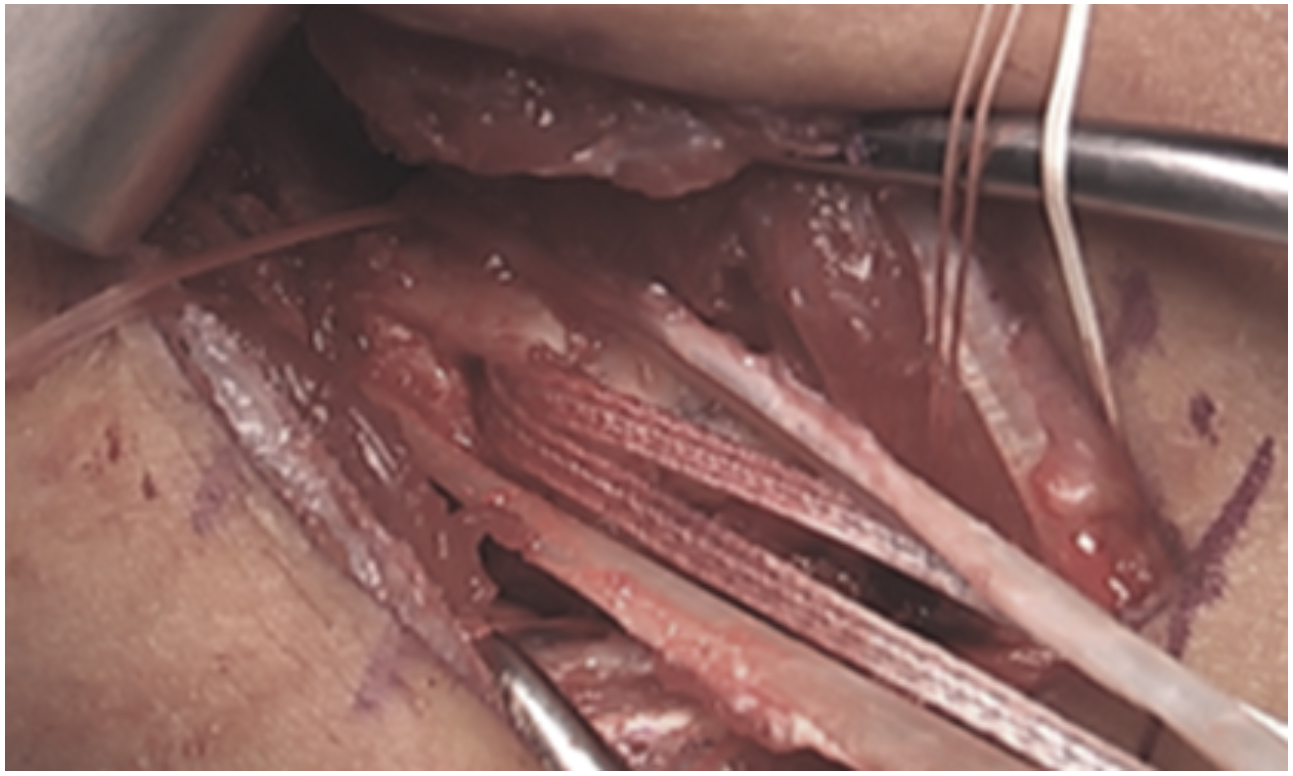
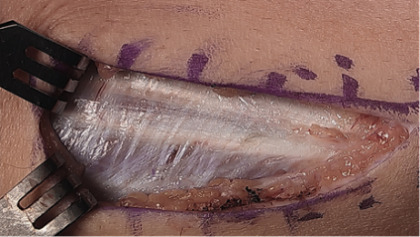
The posterior raphe of the flexor mass is split longitudinally along the length of the skin incision. The split utilizes the interval between the flexor digitorum superficialis (FDS) and flexor carpi ulnaris (FCU). During exposure, care is taken to preserve the anterior fascial layer of the FCU to protect both the muscle and the ulnar nerve.

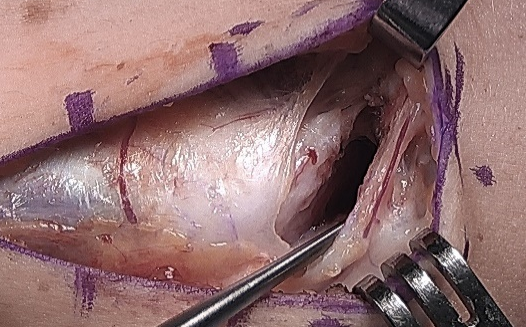
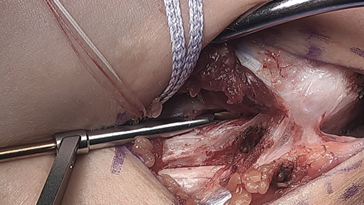
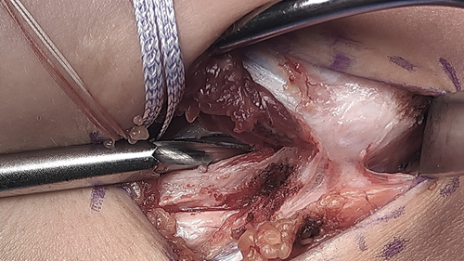
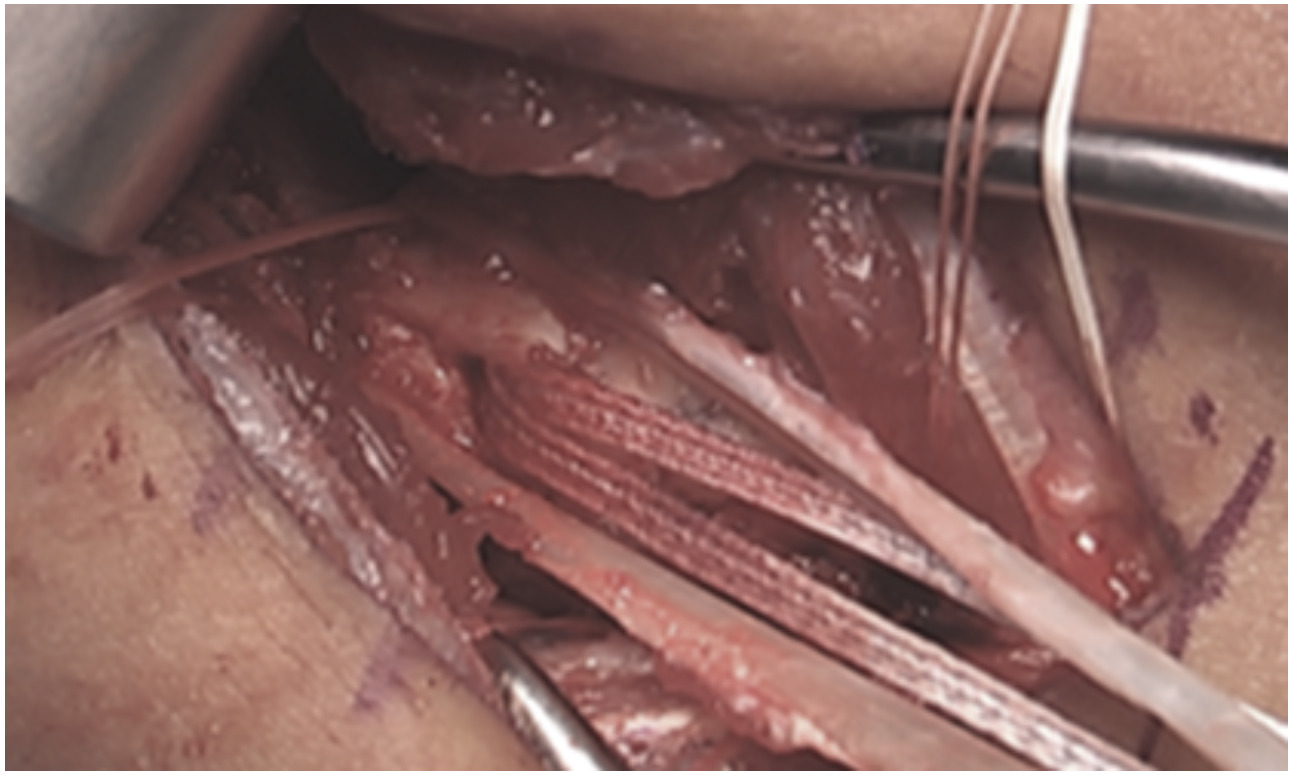
After exposing the anterior bundle of the medial UCL, the ulnar nerve is internally decompressed by incising the overlying fascia of the FCU along its course down to the concavity of the proximal ulna.
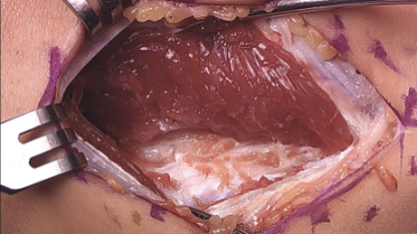
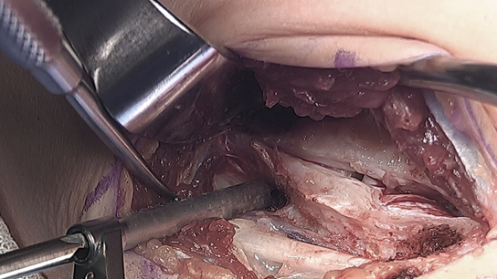
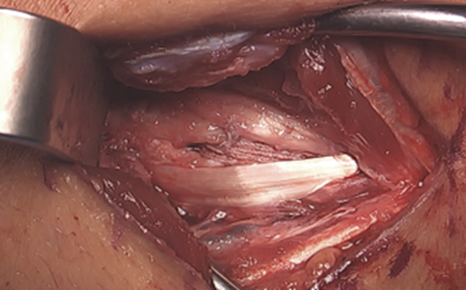
Beginning distally at the sublime tubercle, the ligament is split longitudinally proximally to the ligament footprint origin at the base of the medial epicondyle. The ligament is explored for any acute injury pattern. Additional suturing may be employed for distinct proximal and distal tears.

Distal Drill Holes
At the anterior margin of the proximal ulna, a small fascial window is made to facilitate placement of the ulnar tunnels for tendon passage.
On either side of the concavity of the sublime tubercle, 2 converging 3.5 mm drill holes are made. These tunnels are transitioned with a curved curette and a doubled vicryl suture is passed with a curved needle.


A 2.7 mm drill hole is made at the apex of the sublime tubercle 4 to 5 mm distal to the joint line but proximal to the ulnar tunnels. A 3.5 mm swivel lock anchor loaded with collagen coated fiber tape is placed in the tapped drill hole.


Proximal Drill Holes
At the base of the medial epicondyle, with caretaken to lateralize the proximal tunnel, a 2.5 mm drill bit is used to make a starter hole for the larger drill bit to follow.

This initial hole is then over drilled with either a 4.0- or 4.5-mm drill bit to a depth of 15 to 17 mm.

A 2.5 mm drill bit is is used to create two divergent tunnels through the proximal cortex of the medial epicondyle. Utilizing a Hewson suture passer, doubled over 2-0 vicryl sutures are passed.

Graft Passage
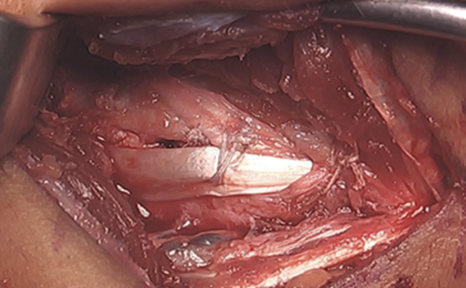
With the arm held in full supination and 30° of flexion primary repair of the distal footprint tear, if present, is performed.

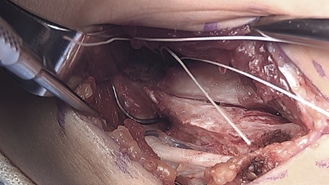
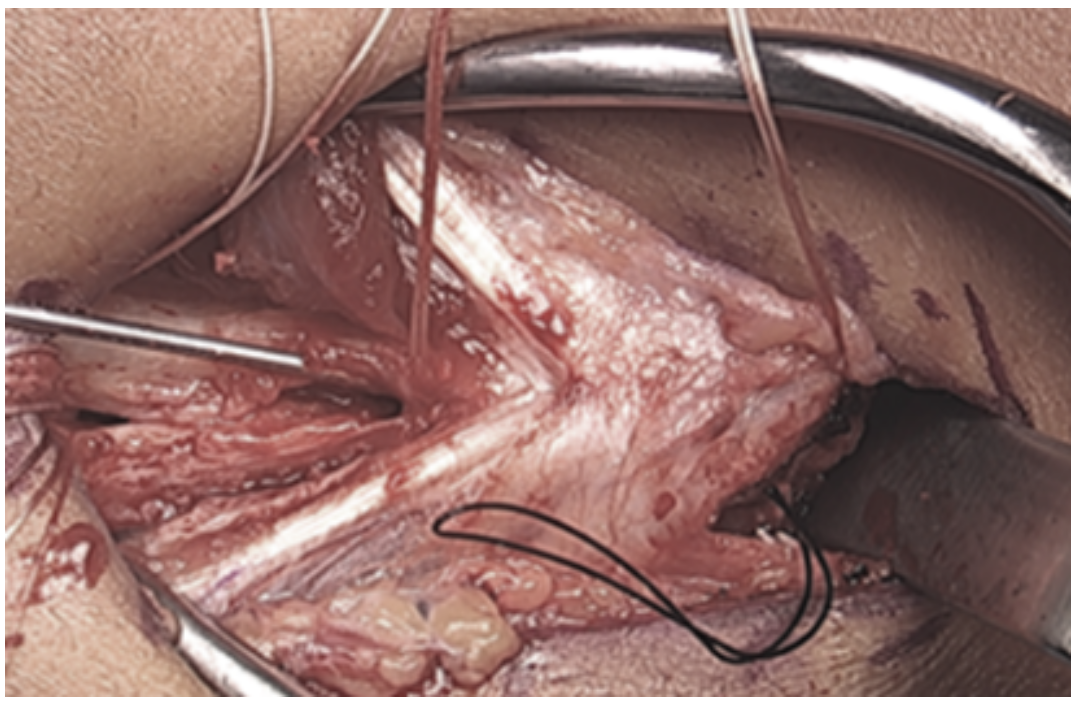
One arm of the tendon graft is docked, with a #2 ortho cord suture with a baseball stitch with one arm of the internal brace. The second arm of the tendon graft is cut to an appropriate length, and the second #2 Ortho cord suture is placed. The second arm of the tendon graft is then docked proximally, followed by the second arm of the internal brace.
The internal brace suture arms are first tensioned and tied using a knot tier. Five throws are placed in the suture arms. The tendon graft sutures are then tensioned and tied as well. *Note that the internal brace is tensioned and tied first to preset the tension on the joint. (Figure 17)


Closure
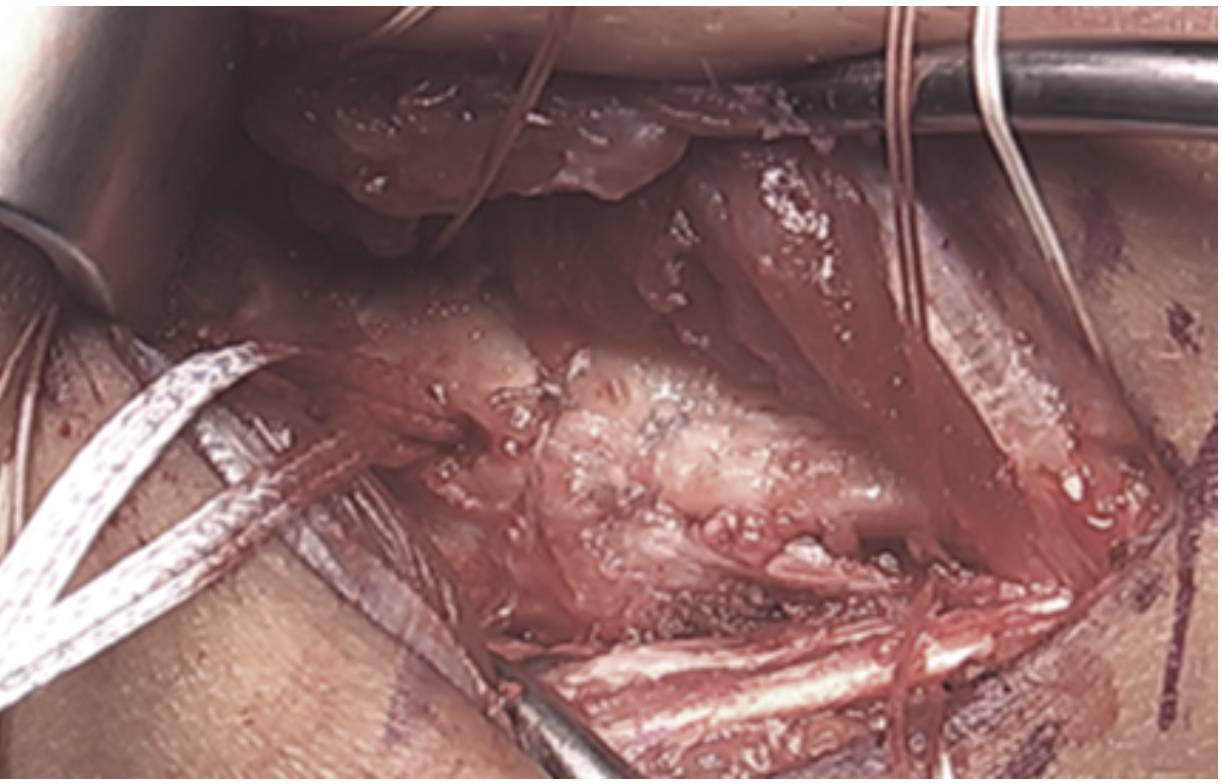
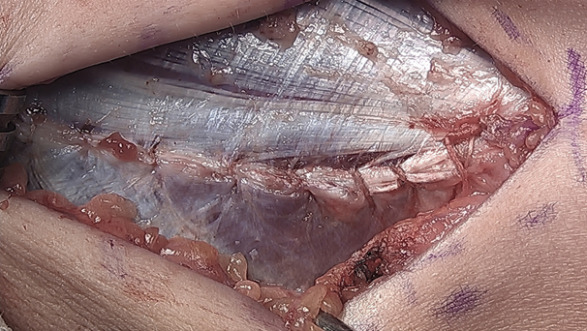
The proximal tunnel lateralized typically leaves a good cuff of the native ligament to sew over the top of the brace/graft. A 2-0 vicryl suture is utilized here in a figure-of-eight fashion. A 2-0 fiber wire suture is then used more distally, bringing together the arms of the tendon graft, native ligament, and internal brace.

The wound is copiously irrigated. The posterior raphe is closed with a running 2-0 vicryl suture.
The skin is closed with a 3-0 monocryl suture in the subcutaneous layer, followed by a subcuticular 4-0 monocryl in the skin.
Steri-strips are applied to the wound, which is infiltrated with several cc’s of local anesthetic. A dry sterile dressing is then applied, and the arm is placed into a postop-hinged elbow brace locked at 90° of flexion and neutral forearm rotation. The patient is awakened and the tourniquet is released following dressing application.
For a step-by-step description of the surgical technique, please review Table 1 and/or Video 1.
REHABILITATION
Rehabilitation following UCL hybrid surgery plays a vital role in the successful outcome following this procedure. The specific rehabilitation program employed following the UCL hybrid procedure presented can be found in Table 2.
Adherence to the post-operatve timeframes, surgical healing constraints, rehabilitation guidelines, goals, and specific exercises prescribed is crucial to prevent complications such as elbow stiffness, graft stretch, or graft failure. The rehabilitation program is designed to be progressive and sequential with each successive phase building upon the previous milestones. Facilitating this progression are specific goals, exercises, and required criteria within each phase that must be met for advancement. To ensure success, a team approach to athlete management is imperative. A collaborative approach involving the athlete/patient, their family, the surgeon, athletic trainer, and the physical therapist is essential. The ultimate goal of the rehabilitation program is to return the athlete to their preinjury level of function and sports performance in a safe an expeditious manner.
This section will outline the specific timelines, rehabilitation techniques, exercise activities, and throwing progression for athletes following UCL hybrid reconstruction. The program provides a general framework designed to guide individualized care to ensure that personal differences and circumstances are taken into consideration and accounted for. Close communication between the athlete, rehabilitation team, and surgeon is essential to ensure any appropriate adjustments can be made quickly keeping the recovery process on track.
Protective Phase (0-3 weeks post-operatively)
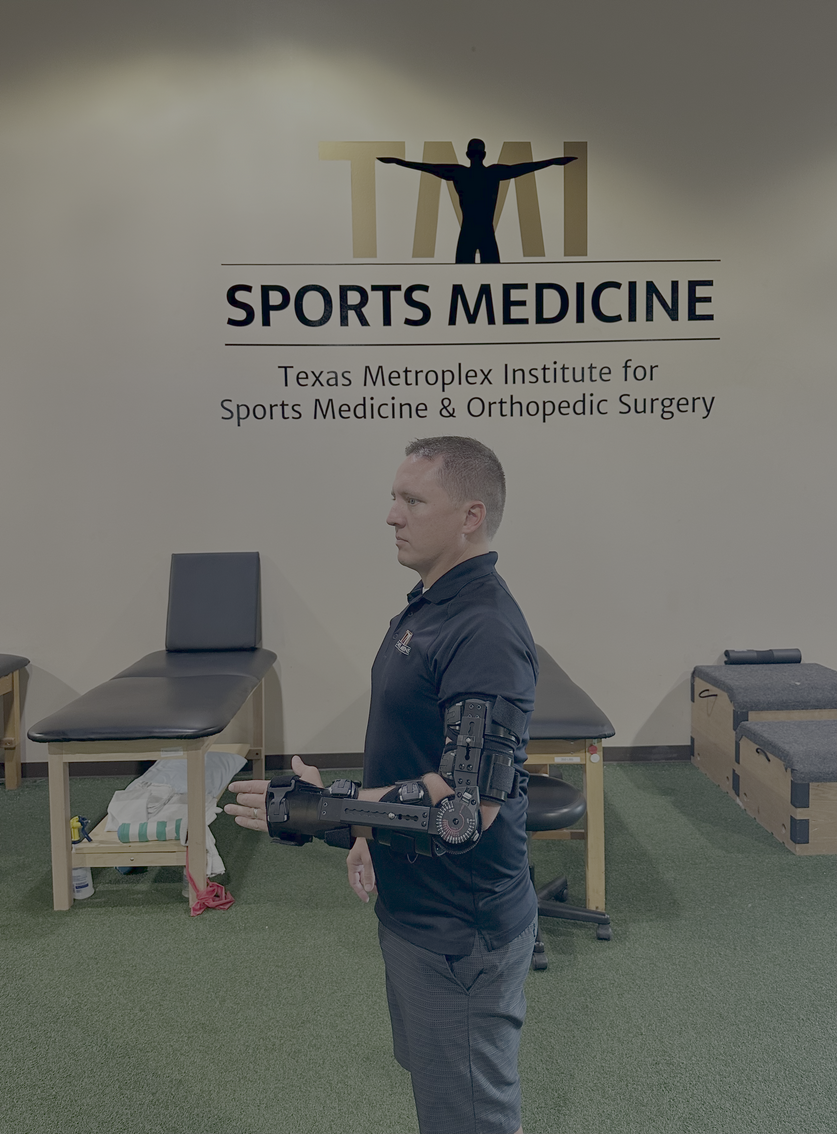
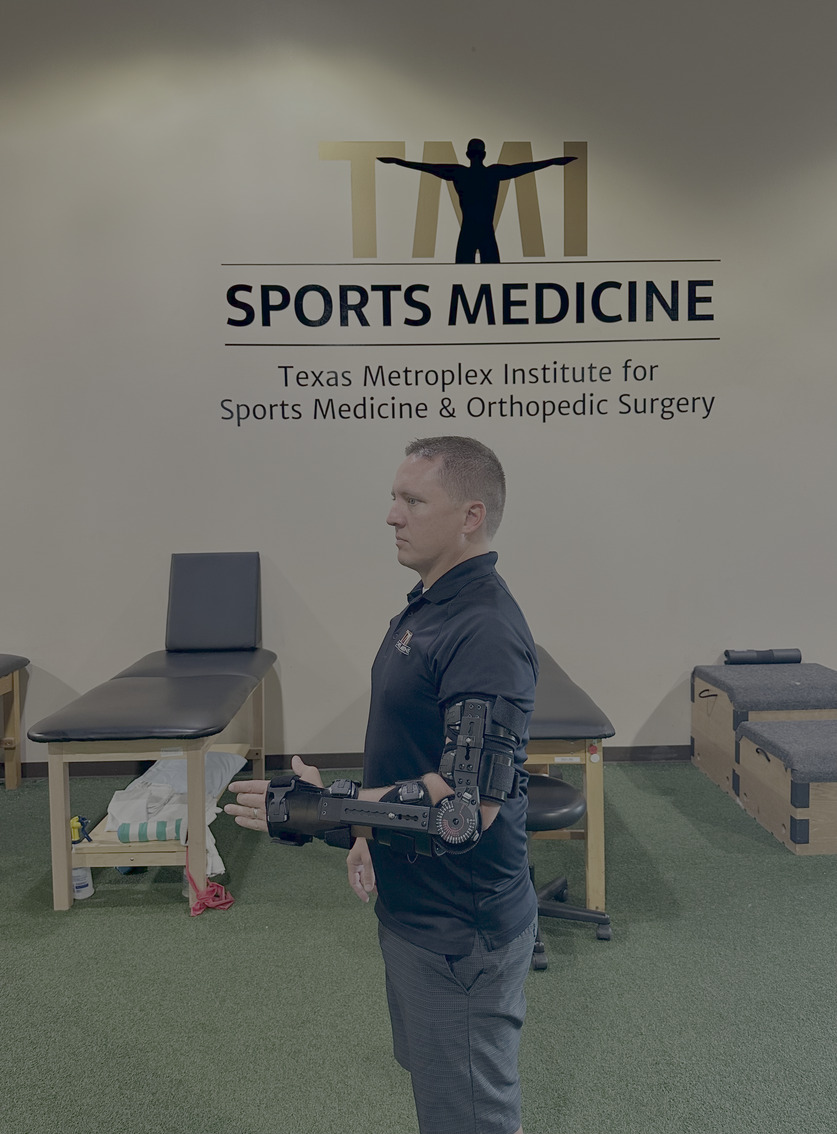
Immediately following surgery, the athlete is placed in an adjustable range of motion (ROM) elbow brace (Fig 22), locked at 90° of flexion to protect the hybrid graft and healing incision. Active range of motion (AROM) of the shoulder,wrist, and hand along with gripping exercises are performed to foster normal upper extremity, hand and finger mobility. Sub-maximal isometric exercises for shoulder flexion, extension, hand/wrist motions are initiated to minimize muscle atrophy and promote blood flow. Manually resisted rhythmic stabilization exercises may also be introduced to establish proprioception and neuromuscular control along with manual scapular neuromuscular control exercises. It is recommended that these exercises are performed in the hinged brace locked at 90 degrees to protect from potential deleterious valgus forces at the elbow.
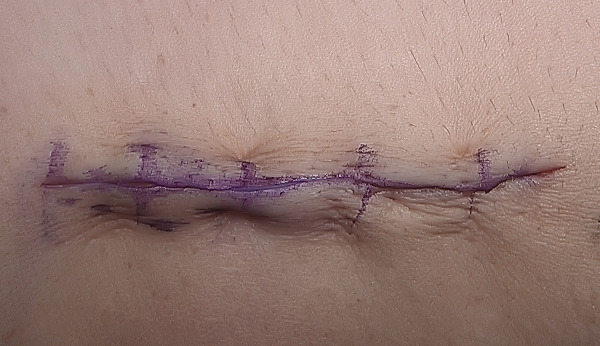
At one week post-surgery, the brace is unlocked to allow ROM from 30 degrees to 90 degrees flexion to begin gradually restoring full elbow and forearm motion. Every week following the end of week two, the brace will be opened another 10 degrees into both flexion and extension, allowing a progressive increase in motion (Table 3). At 2 weeks post-surgery, the sutures are removed, and cardiovascular exercises such as recumbent biking and walking may be initiated to resume some level of cardiovascular conditioning. Lower extremity strengthening can be initiated utilizing weighted vest exercises, leg press, single leg squats, clamshells, bridging, hip sled, or other interventions that eliminate or minimize the use of the upper extremities. Core stability exercises are also encouraged at this time. These exercises are progressed through the end of week 6 after surgery. During this time, it is imperative to allow a gradual return of elbow motion and to avoid excessive overpressure, stretching, or overly aggressive manual therapies to gain ROM as these may lead to inflammation in the elbow and/or ulnar nerve irritation (Fig 23) This type of early aggressive motion may present as a generalized soreness and elbow pain inhibiting the return of full unrestricted elbow ROM. If a loss of elbow motion occurs or motion ceases to improve steadily during this phase, it is imperative to notify the surgeon and develop a modified plan of treatment, such as early brace adjustments or anti-inflammatory medication, to address this issue.
Intermediate phase (3-12 weeks post-operatively)
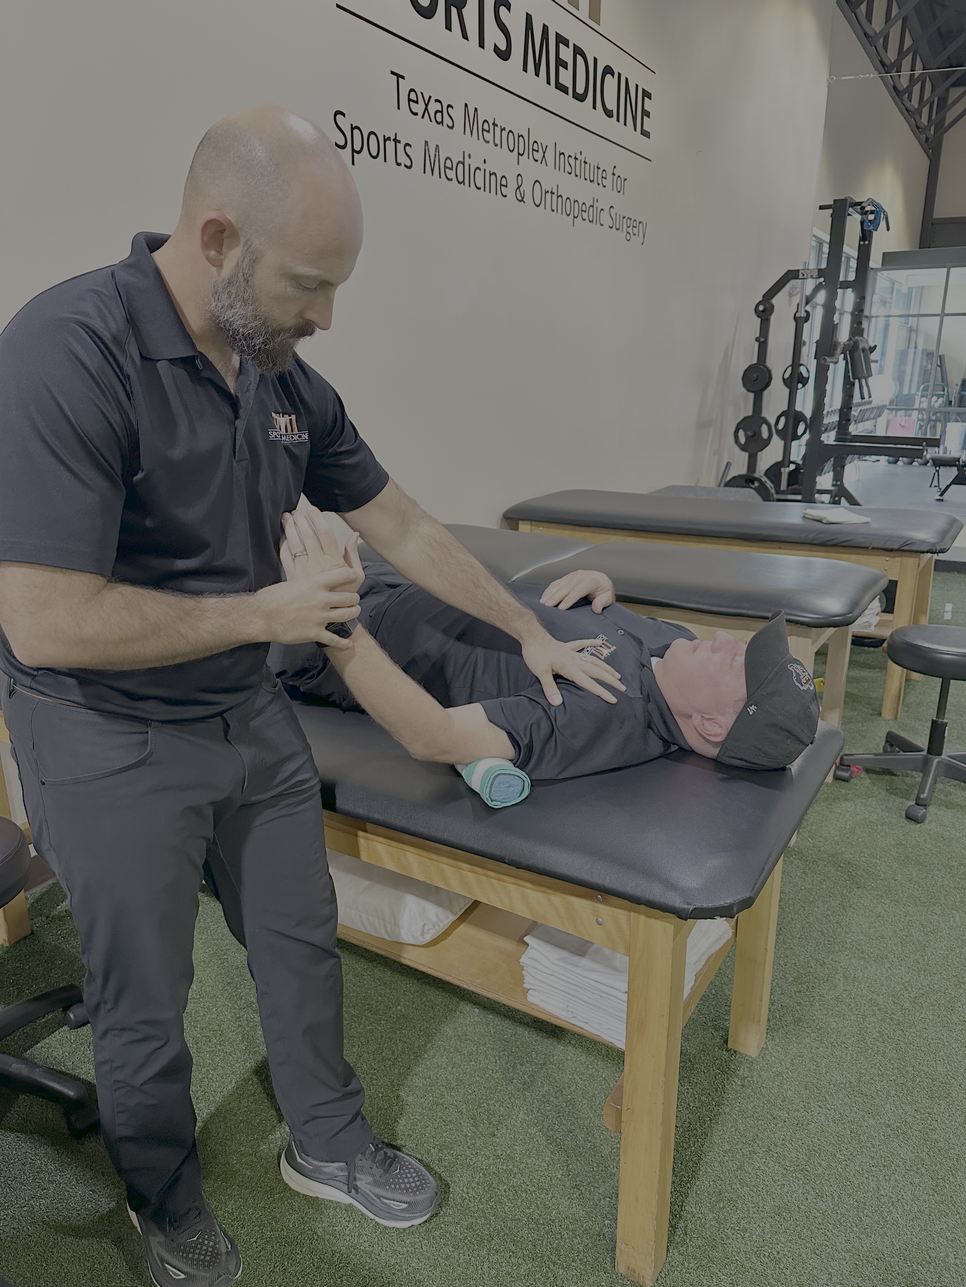
During this phase of the rehabilitation program, elbow ROM is gradually progressed while also restoring muscular endurance, strength, and neuromuscular control of the upper quarter. Controlled rhythmic stabilizations to resist shoulder internal and external rotation may be introduced to initiate valgus loading of the healing hybrid graft. This should be carried out carefully by the rehabilitation specialist and the manual resistance should be pain-free and submaximal in effort. Gentle manual therapy should be continued to assist in the normalization of elbow motion. Caution should still be taken to avoid aggressive PROM and/or manual techniques as the elbow and ulnar nerve may still become inflamed at this point in the recovery. Isotonic shoulder, forearm, and wrist/hand strengthening should all be continued.
At the end of week 6, the post-operative brace is discharged, as the elbow should be near full ROM. While substantial progress in motion is expected by this stage, slight improvements will continue to be seen over the next 1-2 weeks. Characteristically, hybrid reconstructions often have a slower return of full elbow flexion when compared to traditional UCL reconstruction that use a tendon graft alone. Aggressive intervention to achieve full flexion should always be avoided. Again, if there is any concern about the ROM progression, the surgeon should be immediately notified.
During this phase, progressive resistance exercises are introduced and should be advanced weekly. The focus of the exercise program during this phase is to strengthen the muscles of the scapula, rotator cuff, upper arm, wrist and forearm, as well as improve the athlete’s overall posture.17 Examples of the exercises typically incorporated include prone shoulder horizontal abduction (T’s), prone shoulder extension (I’s), prone horizontal abduction at 105 deg with external rotation (Y’s), prone rowing into external rotation (W’s), side lying shoulder external rotation, standing shoulder scaption and abduction, and shoulder internal rotation with resistance bands. Weight room exercise activities for the lower extremities are generally unrestricted, although it is important to continue to avoid any exercise that may impart excessive valgus loads to the elbow. Cardiovascular and core exercises may also be progressed with the same consideration.
At week 10 following surgery, upper body compound lifting may be gradually introduced to prepare the elbow joint for the demands of unrestricted weight training. Initial exercises may include light dumbbell chest press from the floor, bent over rowing with dumbbells, and high rowing on a cable column machine. It is essential to integrate exercises that strengthen the rotator cuff and scapular stabilizers in these movements to maintain optimal mechanics during compound lifting which will serve to support long-term recovery.
Advanced Strengthening Phase (12 weeks to 6 months post-operatively)
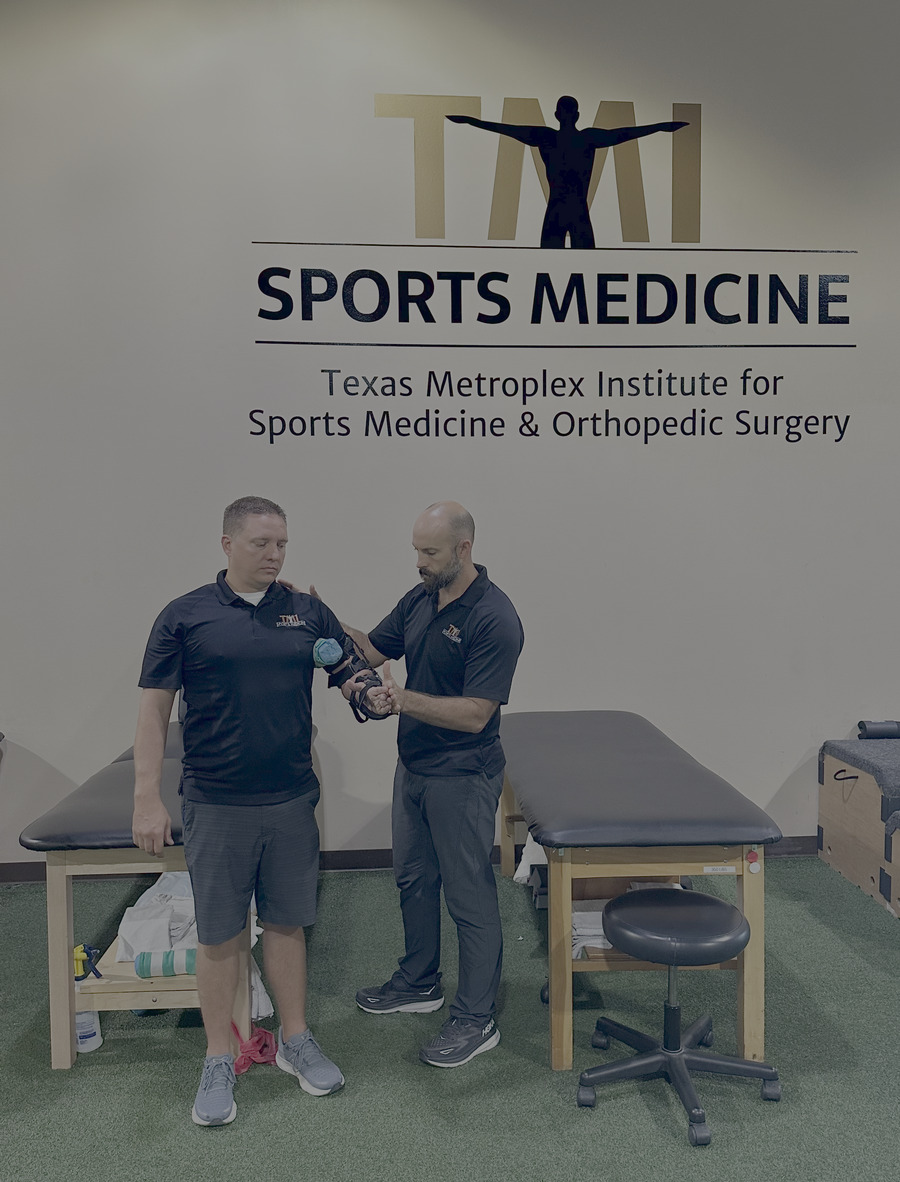
Beginning 12 weeks after surgery, the rehabilitation process focuses on the restoration of strength and power, as well as preparing the athlete for clearance to perform unrestricted weight room training. The athlete must demonstrate full, pain-free ROM of the elbow and no pain with any previous isotonic exercises to advance further. (Fig 24) It is imperative that athletes coordinate their weight room training with a strength and conditioning coach and/or rehabilitation professional who is experienced in developing safe, effective training regimens for overhead athletes. Proper technique and exercise selection are critical to avoid high valgus loads on the elbow, which can compromise the graft and delay recovery.

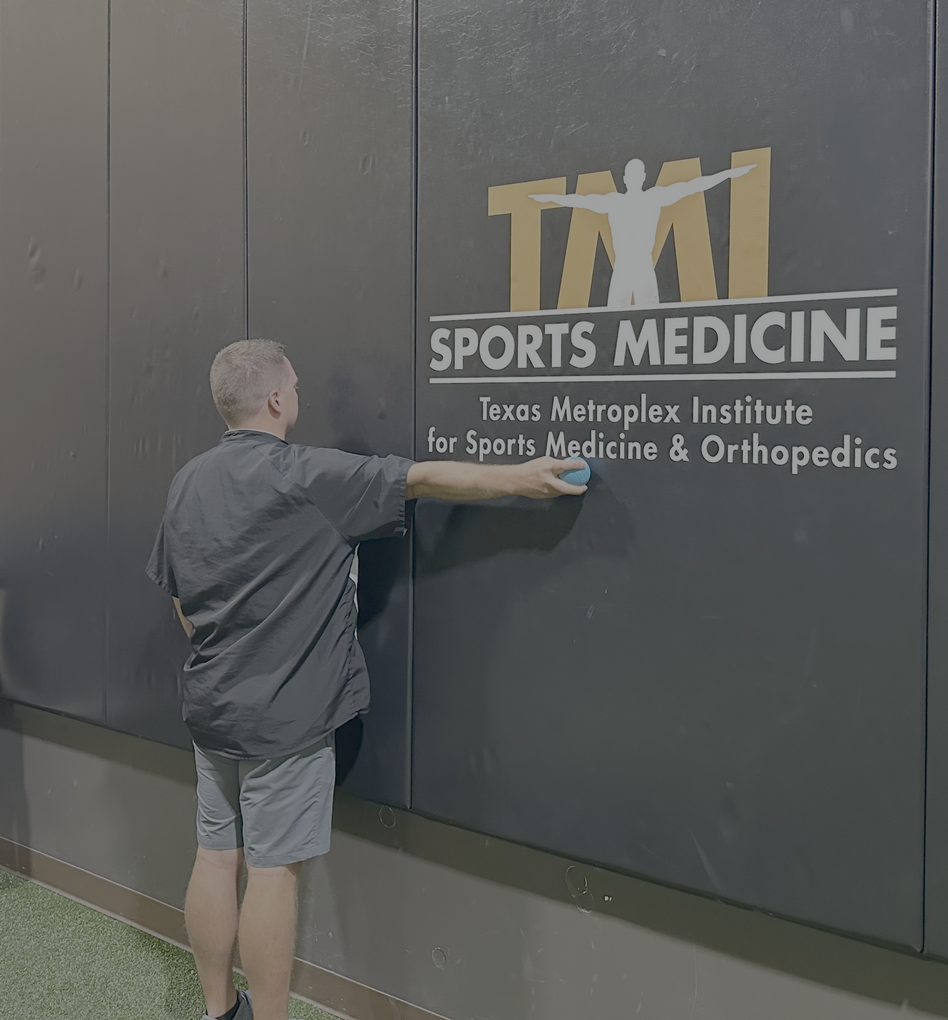
From 15 weeks to 6 months following surgery, there is a continued focus on strength and power with advancing weight room training and continued arm care exercises for endurance and neuromuscular control of the entire throwing extremity. 2-handed plyometrics with a medicine ball, including chest pass, chop pass, overhead side-to-side throws, unilateral push throws, and two hand chest passes are initiated (Fig 25). After 3-4 weeks of successful 2-handed plyometrics, 1-handed plyometrics, such as 90/90 rebounder toss, overhead wall dribbles (Fig 26), shoulder decelerations, and prone flips with a weighted ball, can all be added. Plyometric volume should start low with 2-3 sets of 12-15 repetitions of each exercise and gradually build in additional volume, intensity, and complexity mimicking the throwing demands of the athlete. During this phase, the athlete should also continue to improve strength, endurance, and dynamic stabilization of the shoulder continuing with full weight room training and arm care exercises. Due to the higher demands of pitching in professional athletes, such as higher pitch velocities, spin rates, and pitch volumes, 2-handed plyometrics are initiated at 17-weeks post-surgery and 1-handed plyometrics at 20-weeks post-surgery. In contrast, collegiate and high school level overhead athletes will generally start 2-handed plyometrics at 15-weeks and 1-handed plyometrics at 17-weeks after surgery.


RETURN TO THROWING PHASE
The interval throwing progression (ITP) is a crucial phase of the rehabilitation process assisting the athlete to transition from rehabilitation to training and toward a return to unrestricted competion. It is utilized to condition the shoulder, arm, and body for return to sport and to gradually impose the valgus loads of throwing to the healing graft. During the ITP, the graft is exposed to unique valgus loads that vary for each individual. Characteristics such as throwing mechanics, throwing intensity, volume, and distance determine the load on the graft. As the intensity of the throwing program progresses via distance, volume, and velocity, so does the resilience of the hybrid graft, reading it for full unrestricted return to play.
Although multiple interval throwing programs are used for rehabilitation, we have found that a velocity-based throwing progression leads to the fewest complications and setbacks during this process. The ITP utilized by this author group is outlined in Appendix A. It includes progressive distances and velocities based on the individuals’ abilities when they were healthy, as well as de-load periods interspersed during the ITP. The purpose of the de-load periods is to allow tissue recovery and reduce progressive load, to aid in the prevention of overtraining and reduce risk of injury. The timing of the implementation of an ITP also varies based on the athlete’s level of participation.
Due to higher demands of professional pitching described previously the throwing program is started 6 months following surgery. In contrast, high school and collegiate athletes start their ITP at 5 months post-op.
Certain criteria must be met prior to starting an ITP. It is recommended that the athlete complete all previous phases of the process without issues or setbacks, have full pain-free ROM of the shoulder and elbow, exhibit full strength of the shoulder and elbow, have a satisfactory clinical examination of both upper extremities, and have clearance to begin throwing from their surgeon.
The throwing program begins with a long-toss progression starting at 45 feet and progressing to 60 ft, 75 ft, 90 ft, 105 ft, and 120 ft. During this time, volume and velocity are closely monitored, with recommended velocity ranges based on data from healthy throwers (Table 4a-4c). Frequent clinician-athlete communication allows for personalized adjustments, such as when to implement recovery periods, or the reduction of volume on days when soreness or mechanical inefficiencies are observed. If athletes experience persistent tightness or soreness following throwing sessions, additional rest is recommended, and if symptoms do not resolve within a week, their surgeon should be consulted. This long-toss portion of the program typically last 3 months.
Once the long-toss phase is completed, pitchers begin a mound progression, starting with half-mound sessions and gradually increasing to full-mound, full-distance sessions. Initial mound work focuses on fastballs, with off speed pitches such as change-ups and sliders introduced gradually over the following weeks. Once the mound progression has been completed, facing live batters in a practice setting is recommended. The number of live hitter sessions will vary based on the level of the athlete but should be at least 2 weeks prior to starting a rehab outing. Completion of the entire ITP should take roughly 6-8 months depending on de-load periods, build ups, and timing with the respective competitive season in mind. Athletes will be returned to full unrestricted participation once the throwing/mound progressions have been completed without issues and the medical team and surgeon have cleared the player for unrestricted participation.
Conclusion
The hybrid UCL reconstruction technique offers a reliable and effective approach to addressing UCL injuries, combining the benefits of autogenous grafting with internal brace augmentation. Successful outcomes following this procedure are accomplished through a team approach from surgery to rehabilitation. Patient compliance with the program and adherence to progression timeframes is imperative to ensure a successful outcome. With over 400 successful applications of this hybrid technique, this method has proven to enhance stability and facilitate recovery in the elite-level throwing population. Further studies are needed to determine long-term success rates, possibly refine this surgical and/or rehabilitation technique, and optimize outcomes.