


The number of injuries to the ulnar collateral ligament (UCL) of the elbow are rising every year. Several studies have reported increasing numbers of injuries, associated surgeries, and that patients affected by UCL pathology are gradually becoming younger. Hodgins et al reported a 193% increase in the number of UCL surgeries in the state of New York from 2002 to 2011.1 Erickson et al reported the age range for most UCL surgeries in the United States to be between 15-19.2 Conte et al noted in a survey of professional baseball teams, that 25% of all major league pitchers have undergone UCL surgery, while only 14% of minor league pitchers have had UCL operations.3 Just four years later, the number of minor league pitches reporting prior UCL surgery increased by 5% to 19% and the number of major league pitchers affected to 26%.4
The American Sports Medicine Institute (Birmingham, AL) has noted a shift in the majority of patients presenting with UCL injuries. Twenty-five years ago, that majority were college and professional aged baseball players, now the athletes sustaining UCL injuries are predominately younger than collegiate age. From 2001 to 2019 at the Andrews Sports Medicine and Orthopaedic Center 4,606 UCL surgeries were performed with an average age of 17.6 years. This shift to younger patients being affected by UCL injury more often brought into focus the dilemma of athletes nearing the end of promising careers almost before they have even started. This also demonstrates the importance and the need to return to play as soon as safely possible. The internal brace repair for the UCL injured athlete appears to be a reasonable option to address these issues for the appropriate candidate.
Diagnosis of UCL tears is accomplished through a combination of physical exam and diagnostic imaging, in the context of patient history.5 Non-operative management of UCL injury has historically been reserved for low to medium-grade partial tears.6 Non-operative treatment is comprised of rest from throwing, rehabilitation to strengthen and improve throwing mechanics, and a graduated return to throwing program over a 3-4 month period of time. Additionally, the use of biologics such as platelet rich plasma (PRP) have the potential to augment the effectiveness of non-operative management in certain instances.7 For high demand throwing athletes that fail conservative management, surgical intervention is warranted.
Since Dr. Frank Jobe’s initial description of the UCL reconstruction in 1974, it has been the gold standard for treatment of medial sided elbow pain and laxity in the throwing athlete.8,9 Reconstruction techniques have evolved over time with varied applications including docking, Jobe, and modified-Jobe techniques.10–12 Early comparisons of repair versus reconstruction revealed poor outcomes, with less than 30% of repairs returning to the same or higher level of play, especially in a subset of Major League Baseball (MLB) overhead athletes.13,14 Although return to play rates are high with UCL reconstruction, between 85 -90%, the rehabilitation process which ranges between 12-18 months for pitchers is longer than desired.15
Newer technology and greater experience performing direct repairs of the UCL have demonstrated return to play outcomes greater than 95%.16,17 Dugas et. al published two outcome studies first establishing the non-inferiority of UCL repair with internal brace to the modified Jobe reconstruction and then reporting outcomes and return to play to the same or higher level in greater than 90% of patients, 92% of which returned to competition in a 6-7 month time frame.18,19
Although the potential for shorter rehabilitation and quicker return to play are attractive advantages of UCL repair with internal brace when compared with a reconstruction, patient selection is crucial for success. There has been a trend toward an increasing number of adolescent and youth sport participants with UCL injury.16,17 These younger athletes typically have end-avulsions of the UCL or partial tears of the ligament in otherwise healthy ligament tissue. These types of injuries lend themselves well to repair with internal brace. The UCL repair cannot augment a preexisting tissue deficiency. Patients with chronic UCL insufficiency or adaptive changes such as ossification of the ligament are not repair candidates.
Surgery Technique
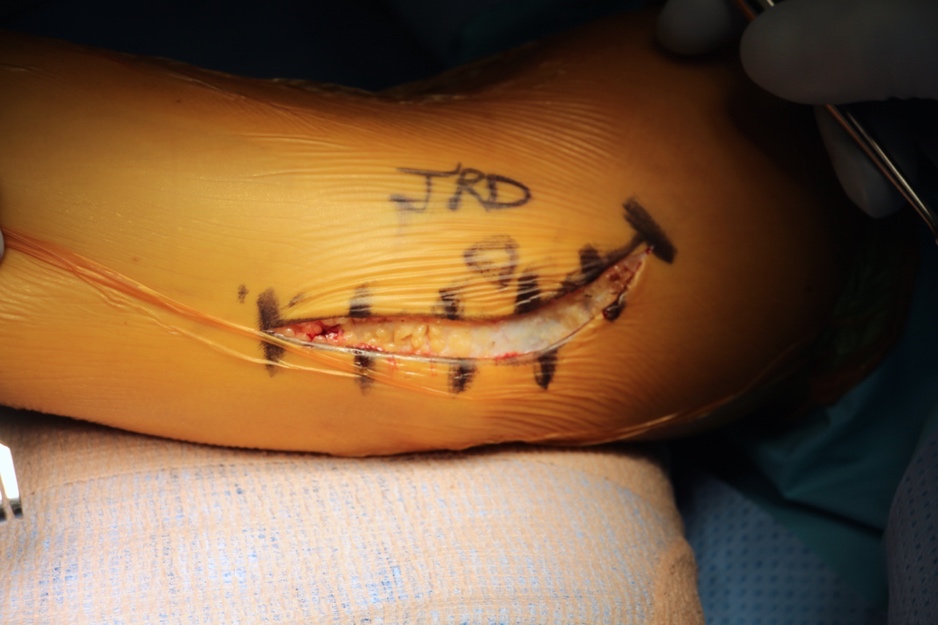
The authors’ current surgical approach to repair of the UCL includes the standard medial incision just posterior to the medial epicondyle (Figure 1). The cubital tunnel is exposed, and the ulnar nerve is dissected out both proximally and distally. The ulnar nerve is transposed to decrease the rate of post-operative ulnar neuritis.20 The sublime tubercle and medial epicondyle are then identified. For UCL exposure, a muscle-elevating approach is used to elevate the flexor-pronator musculature off the anterior band of the UCL.13,21 With full exposure of the ligament, the anterior band is split in line with its fibers in order to access and debride a proximal or distal avulsion. Once completed the internal brace, which was prepped on the back table, is placed through a 3.5 mm SwiveLock (Arthrex Inc, Naples, FL) with a 2-0 nonabsorbable suture for repair.
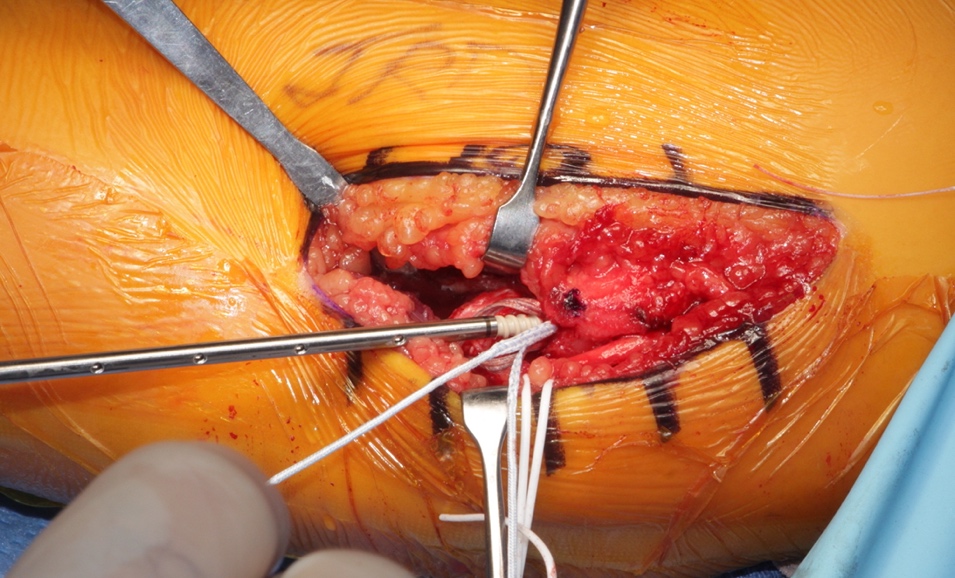
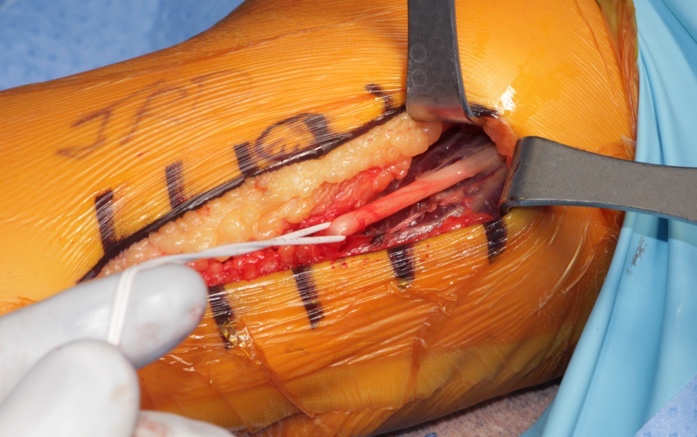
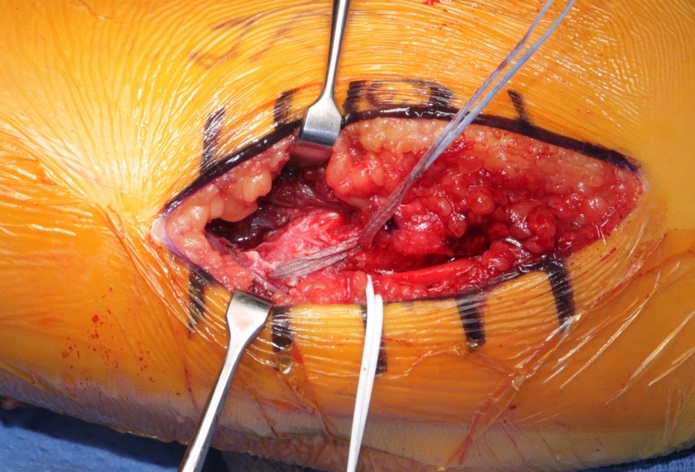
The drill guide is then inserted either on the center of origin of the UCL at the medial epicondyle for proximal tears or the anterior aspect of the sublime tubercle for distal tears.22 The first anchor of the internal brace is placed appropriately and the limbs of the nonabsorbable suture are passed through the ligament’s anterior and posterior bands and tied in simple fashion to complete the repair. The remaining FiberTape (Arthrex Inc, Naples, FL) is then loaded through a second 3.5 mm SwiveLock. A similar drilling and taping process is performed on either the remaining proximal or distal end of the ligament. The longitudinal split in the ligament is then closed with an interrupted 0 vicryl. The FiberTape is tensioned as to not supersede the native tension of the ligament and the anchor is provisionally inserted as the arm is taken through a full range of motion to confirm reduction of the joint with adequate tensioning and isometry on the graft, ensuring there is no non-physiologic constraint of the repaired UCL. The 3.5 SwiveLock is then inserted until the anchor is seated. Finally, interrupted 0 vicryl sutures are placed around the native ligament and around the internal brace to supplement fixation and prevent windshield wipering of the brace itself (Figure 2). The ulnar nerve is transposed anteriorly and secured under two fascial slings with 3-0 ticron and the internal brace is complete (Figure 3a/b).


In a cadaver study examining the UCL repair construct, UCL repair with internal bracing is more resistant to gap formation under fatigue loading than UCL reconstruction.22 Additionally, in cadaver specimens, contact mechanics of reconstructed and repaired specimens were not significantly different. Both reconstruction and repair procedures returned the overall resistance of the joint to valgus torsion to near-intact levels.23 Clinically, the authors have experienced good outcomes utilizing the described technique for UCL repair with Collagen-Dipped FiberTape augmentation in Overhead-Throwing Athletes.
Rehabilitation
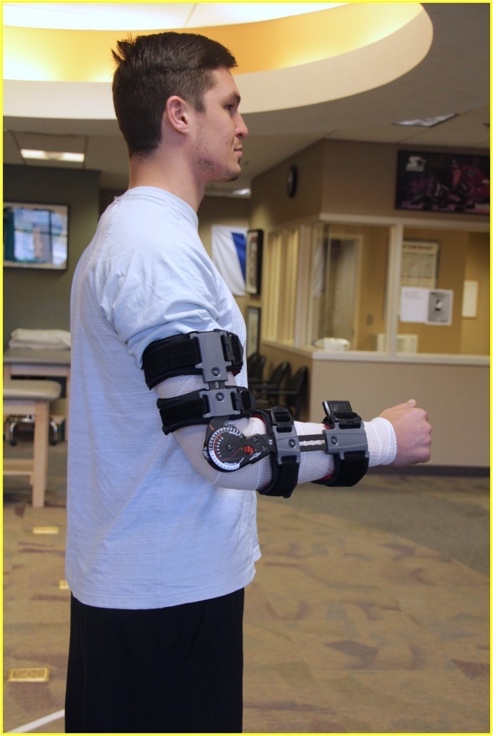
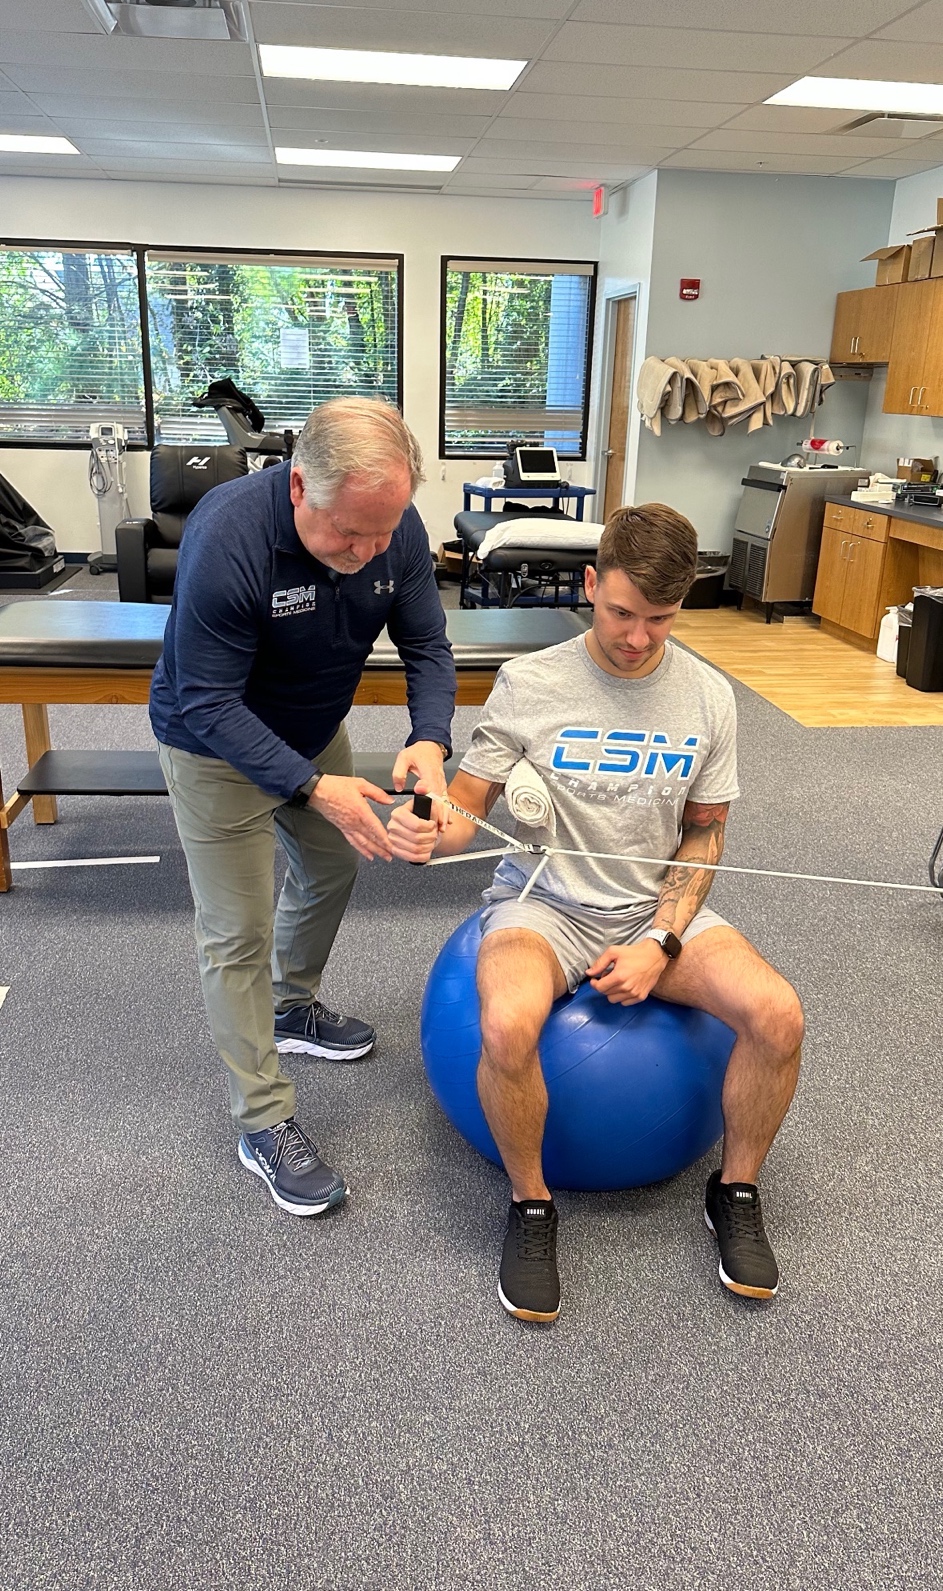
Rehabilitation following a UCL repair with internal brace (Table 1) begins on post-operative day 1 with an emphasis on shoulder and wrist passive range of motion (PROM), light voluntary muscle activation exercises for the shoulder, dressing/wound care, and ensuring that there is optimal communication between the rehabilitation team and athlete/patient. The goal of the rehabilitation process is to return the athlete to his or her previous functional level, or better, as quickly and safely as possible. Phase one (week 1) is intended to protect healing tissue, reduce pain and inflammation, minimize muscular atrophy, and regain full wrist/shoulder motion, while allowing early healing of the surgical repair. For the first week after surgery, the patient is placed in an adjustable ROM elbow brace (Figure 4), with the elbow immobilized at 90° of flexion to protect the healing of the UCL repair and ulnar nerve transposition. A primary focus in phase one is on voluntary muscle activation to help minimize muscular atrophy of the shoulder and scapulothoracic musculature, with all exercises performed isometrically, in a non-painful submaximal fashion with the elbow brace locked at 90° of flexion. Rhythmic stabilization drills are also performed for the shoulder external and internal rotator muscles to begin re-establishing proprioception and neuromuscular control of the upper extremity.

Phase two (weeks 2-5) focuses on gradually restoring elbow joint ROM (Figure 5), improving muscular strength and endurance, and normalizing joint arthrokinematics. On day 8 post-surgery, the elbow ROM brace is set to allow elbow motion from 30° to 110° of flexion. At the beginning of week 3 the brace is unlocked further progressing to 10° to 125° of motion. At this time the Throwers Ten program24 is usually initiated (Figure 6), based on the patient’s progression and signs and symptoms (Appendix A). By week 4 the elbow brace is unlocked to allow 0° to 145° of motion. Full elbow ROM is expected by the end of post-operative week 4. If everything improves as expected, the brace is discontinued by week 6 and the athlete progresses to the Advanced Throwers Ten exercise program.25 (Appendix A) (Figure 7).


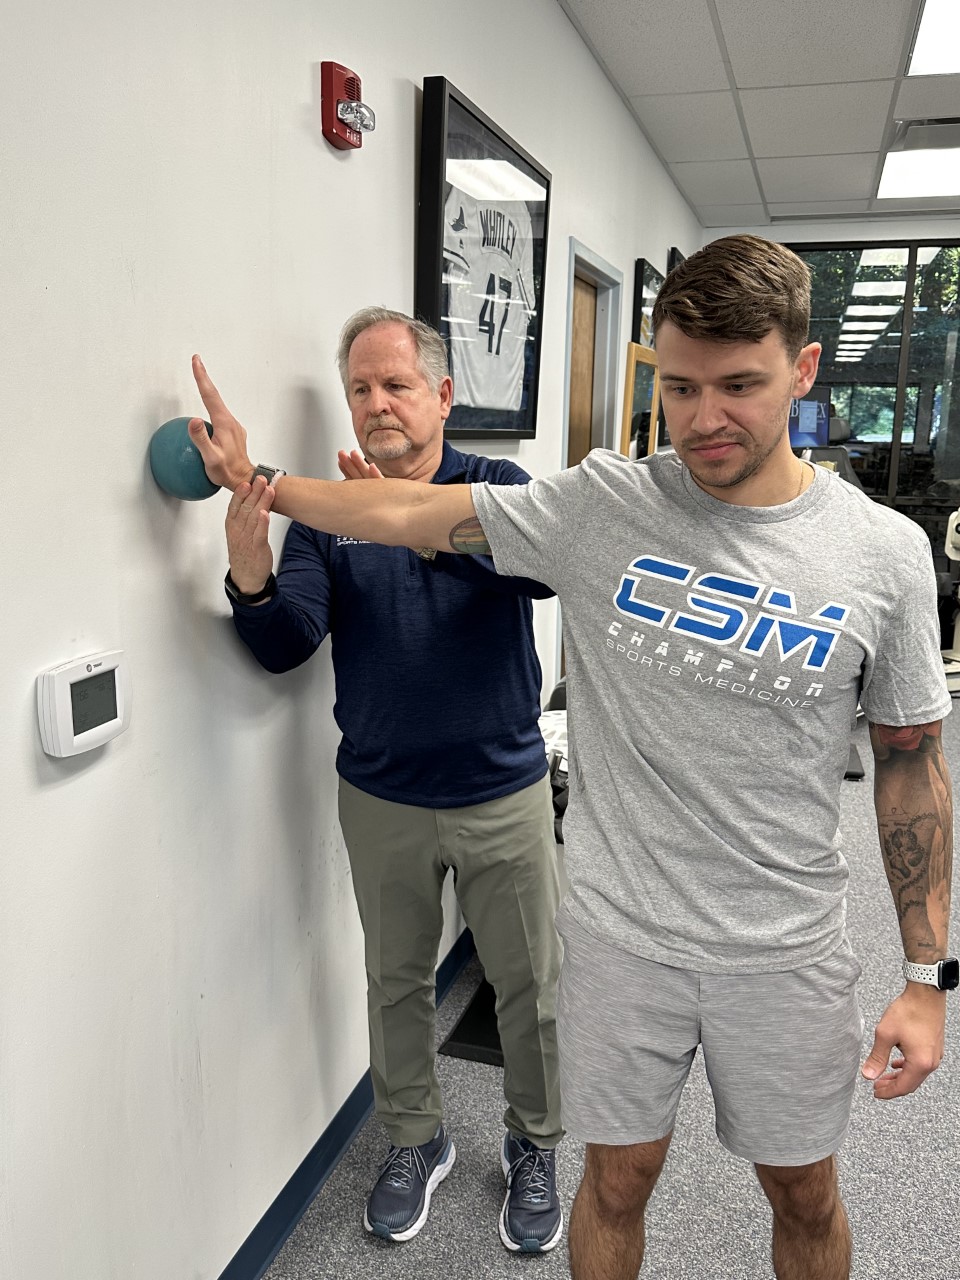
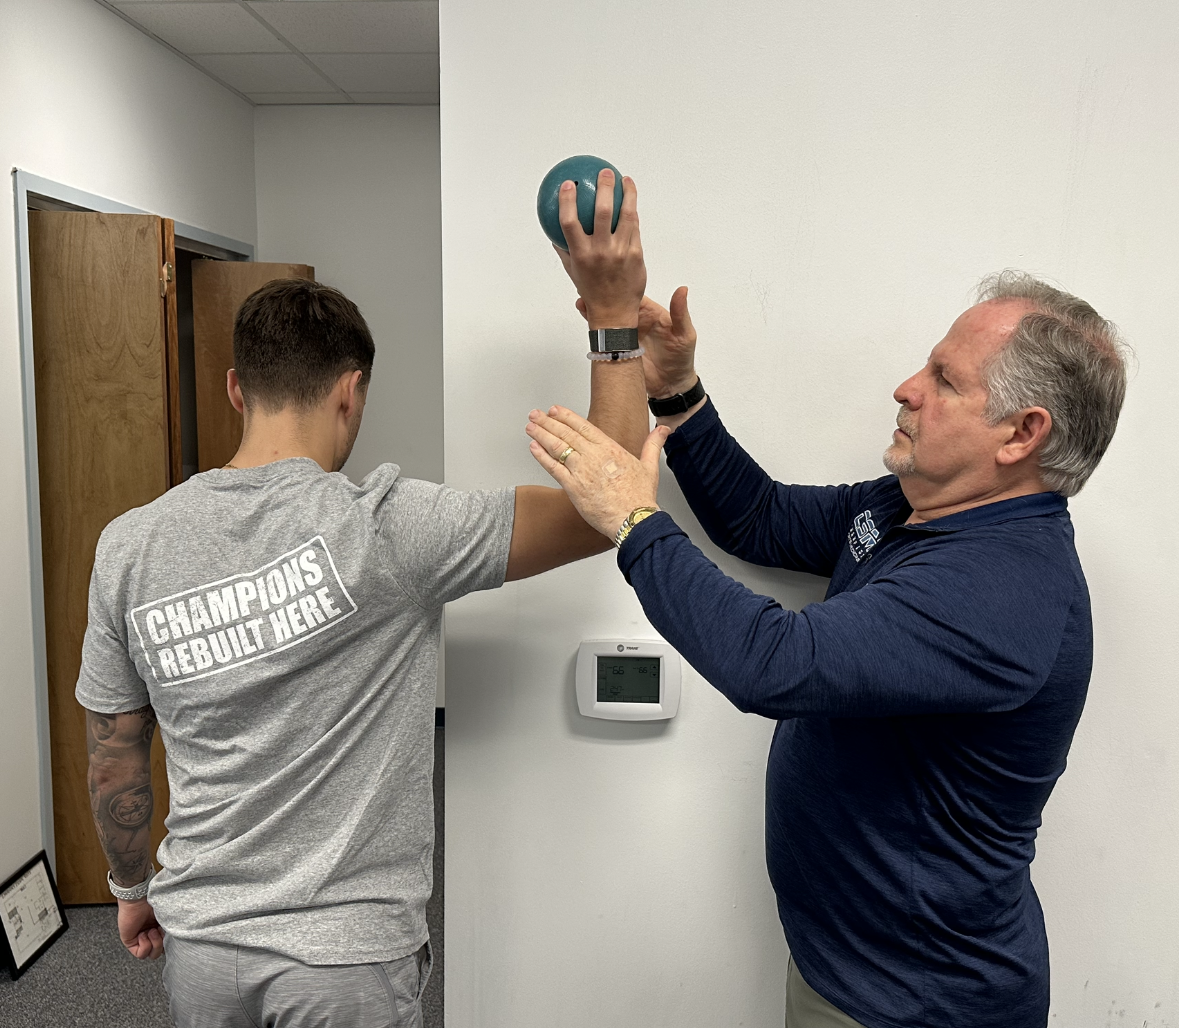
Phase three (6-8 weeks) of the rehabilitation process emphasizes maintaining (or fully restoring, if still limited) elbow and upper extremity mobility, improving muscular strength and endurance, reestablishing neuromuscular control of the elbow complex, and continuing with the progression of functional activity. During this phase, 2-hand plyometric upper extremity exercises are initiated, beginning with two hand plyometric chest pass (Figure 8). One hand plyometric throwing into a wall or rebounder with a light plyometric ball (1 & 2 pounds) is initiated at 8-10 weeks (Figure 9), depending on the patients progress and assessment. Dynamic stabilization drills such as ball on wall with stabilization (Figure 10), and one hand ball throws into the wall with end range stabilization (Figure 11) are also routinely performed in this timeframe.


_with_end_range_rhythmic_stabiliz.png)
Phase four begins at week 9 and goes through week 16 following surgery. The goal of this phase is to gradually increase strength, power, endurance, and neuromuscular control to prepare the athlete for a gradual, progressive return to sports. The athletes exercise program is progressed to include more aggressive eccentric and plyometric movements during this phase. An interval hitting program is initiated at week 10, while an interval throwing program (ITP) for the overhead athlete is allowed to begin at week 12 after surgery, if the athlete is ready.24,26,27 In most cases, pitchers will progress to throwing from a mound approximately 8 to 10 weeks after initiation of an ITP.28
A series of return to play tests is performed before initiating the ITP. These tests include the following: 1)PROM testing for the entire upper extremity, 2) manual muscle testing for the entire upper extremity using a hand held dynamometer, 3) a satisfactory clinical exam of the elbow & shoulder, and the 4) the following functional tests: single arm prone ball drops (Figure 12), ball throws into the wall, ball throws into the plyoback from 20 ft away, single leg squats, and a prone plank test for time.

The final phase (16+ weeks) of the rehabilitation process is the return-to-activity phase. During this phase, the goal is to allow the athlete to progressively return to full activity and competitive throwing. Gradual return to competitive throwing begins 5 months following UCL repair with internal brace, in contrast to 9 to 12 months following UCL reconstruction.15,29 During this return to competition phase, the athlete is instructed to continue the throwers ten +4 program to maintain ROM and strength for the entire body (Appendix A).
The outcomes demonstrated thus far using this procedure and rehabilitation program have been encouraging. UCL repair with internal brace has been performed at our center since 2013 with approximately 527 procedures performed to date. Dugas et. al examined outcomes in 111 overhead athletes, 92% (102/111) of those who desired to return to the same or higher level of competition were able to do so at a mean time of 6.7 months.19 Recently, Rothermich et al presented results of 40 non-throwing athletes who had undergone UCL repair with a minimum follow up of 2 years, the results indicated a 93% return to play rate with the average time to play occurring at 7.4 months.30 Based on our clinical observations, the success rate of 92-93% appear to be sustained for the long term (5-7 years and beyond).
Summary
The UCL is frequently injured in overhead athletes and these injuries continue to increase in number, particularly in youth athletes. Surgical repair of the UCL with internal brace is a viable option in athletes who meet specific findings at the time of surgery. The rehabilitation of this unique surgical procedure has been presented based on the authors’ experience treating more than 350 athletes over the past 3 years. The average time required for an athlete to return to participation in this cohort is 7 months which is approximately 5 months less than average return to play times after UCL reconstruction surgery. Long-term results of this surgery and rehabilitation program are still needed but the initial experience is extremely promising. Long term studies are needed to determine the effectiveness and longevity of this procedure and rehabilitation program.